Log onto WordPress
- Go to paloaltobridge.org/wp-admin
- Enter your username and password
- You will be taken to the ‘Dashboard’ – the main page for editing our site.
Create a New Event
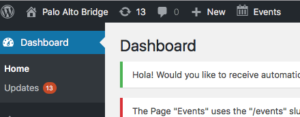 Select Event > New Event from the menu at the top left of the dashboard, or,
- Select Events > Add New from the menu on the left side of the page
You may also start by duplicating an existing event and editing it:
- (easiest)
- Select an event from the event calendar
- Select Edit Event at the top of the page (you must be logged in)
- Select Duplicate Event above the blue Update button
or
- Select Event > New Event from the menu at the top left of the dashboard
- Use the Search Events field on the right side of the page to search for the event you want to duplicate
- select Duplicate Event button above the blue Update button
Special Events, only – Create Custom Title
 Specify the title using the Custom Title Creation area below and to the right of where you added the event.
- Select Special Events in the Event Categories area.
All other Events
Enter the event name in the Enter title here field.
Education Events, only – Add Event Details
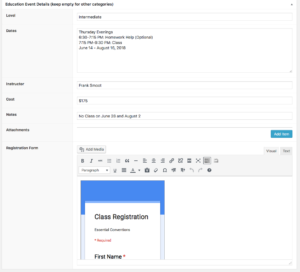
- Use the Education Event Details section to enter event details.
- To use Google Forms for registration, embed the form in the Registration Form field
- To use a website form and email for registration leave the Registration Form field blank.
All Events – Add Event Description
Select the editor you want to use:
- Front End – this is a simple WYSIWYG (What You See Is What You Get) editor with limited formatting.
- Back End – this is a simple non-WYSIWYG editor with one large edit area for text, links, pictures, etc.
- Classic – this is the most sophisticated editor which allows formatting such as multiple columns, background colors, pictures, etc. It is not WYSIWYG.
Select the visual mode for the Back End and Classic editors:
- Visual – this is the simplest mode which is appropriate for simple text. Most people will use this mode.
- Text – this changes the page into HTML code for greater flexibility. If you do not know HTML do not use this mode.
Enter the event information:
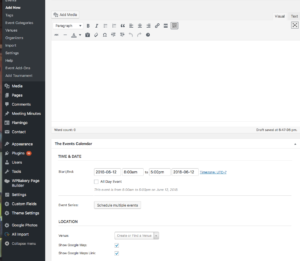
- Use the Events area to add a description of the event using text and/or images.
- Specify the Time & Date of the event.
- Use the Event Series field to create a recurring event or to add specific dates for the event.
- Use the Event Will Not Occur field to specify dates a recurring event will not be held on.
- Specify the Venue (location) of the event. There are pre-sets for our game locations but not for other locations such as tournaments. If your event is at another location leave this blank.
- If you selected a Venue, select Show Google Map and Show Google Maps Link.

- Scroll the page down to the Excerpt field and enter the text you want to display when someone hovers their mouse over the event on our Event Calendar. If you leave this blank the system will use the first portion of the event description.
- You can also enter other information such as the organizer, website and the cost of the event.
Preview the Event
When through, go back to the upper-right area of the page and select the Preview button. Wordpress is finicky and you may have to select it twice. This will display the page in a new tab as it will look on our website.
Review the event and the text that is displayed when your mouse hovers over the event in the calendar.
Delete the tab to return to the edit page.
Edit and Add the Event
Make any corrections to the event. When done select the blue Publish button. Again, you may have to select it a twice.
Go to the Event Calendar page and verify that the hover text and event description are what you want. If not, use your browser Back button to return to the event and re-edit and publish it using the blue Update.